
Integrations
Integrate Chatbix AI Anywhere
Chatbix AI can be integrated across multiple platforms including websites, messaging apps, and collaboration tools. Choose the integration that fits your use case.
Web / Bubble – Embed in a Chat Bubble
Embed Chatbix AI as a floating chat bubble on your website. This is ideal for customer support and lead generation.
Open Widget Settings
Go to your Agent → Agents Settings → Deploy → Web / Chat Bubble section.
Configure Widget Options
Customize how your chat bubble appears and behaves on your website.
- Set the Window Title shown on the chat widget
- Define an Initial Message (Markdown supported)
- Enable or disable message popup
- Remove Chatbix AI branding (Pro plan required)
- Add message suggestions for users
- Choose brand color and widget position
Embed Chat Bubble on Your Website
Copy the embed script and paste it inside the HTML
section of your website.Preview & Publish
Use the live preview panel to test your chat bubble before publishing.
Web / Standard – Embed in a Container
Embed Chatbix AI inside a specific section of your website, such as a support page or dashboard.
Open Web Standard Settings
Go to your Agent → Settings → Web / Standard section.
Customize Widget Appearance
Configure how the chat widget appears when embedded inside a container on your website.
- Set the window title displayed in the chat header
- Define the initial message (Markdown supported)
- Disable the initial message popup if needed
- Remove Chatbix AI branding (Pro plan required)
- Add message suggestions for quick user actions
- Choose a brand color for the widget
- Enable transparent background if required
- Add Custom CSS for advanced styling
Embed Chat in a Container
Copy the embed code below and paste it into the HTML page where you want the chat widget to appear.
Preview & Publish
Use the preview panel to verify the embedded chat works correctly inside your layout.
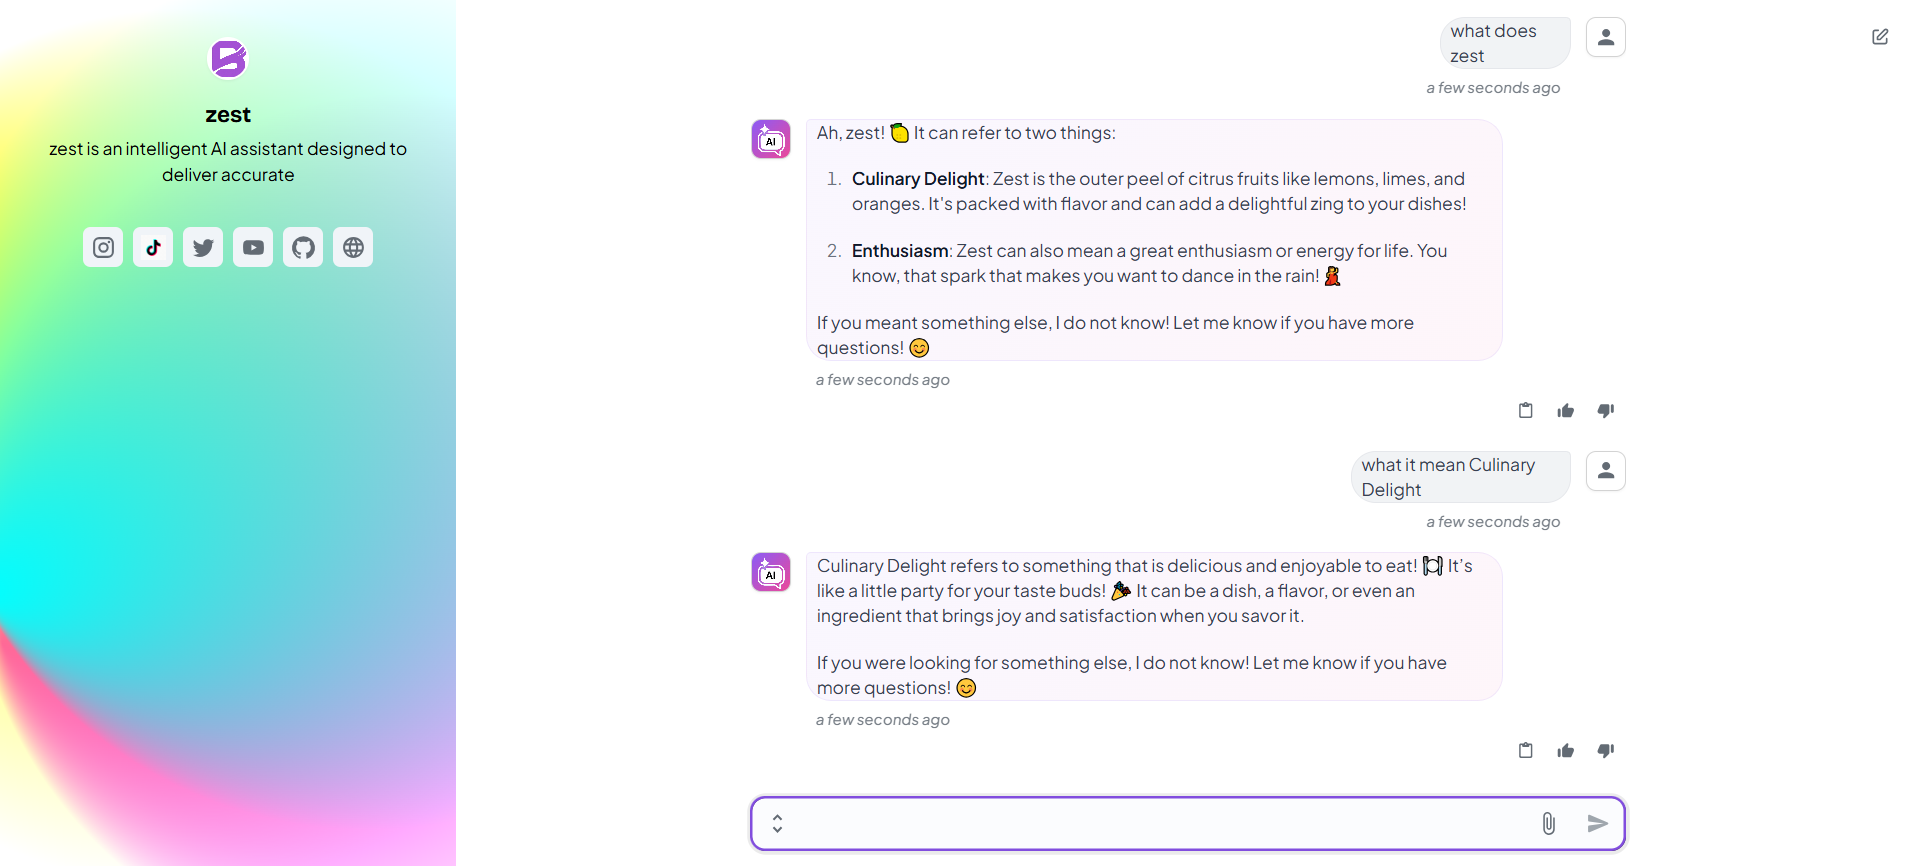
Web / Standalone – Hosted Page
Create a no-code standalone chat page hosted by Chatbix AI. Perfect for sharing via link.
Open Widget Settings
Go to your Agent → Agents Settings → Deploy → Web / Standalone
Configure Widget Options
Customize your chat widget with the following options visible in the settings panel.
- Set the Window Title: `title`
- Define an Initial Message (Markdown supported)
- Disable initial message popup (toggle)
- Remove Chatbix AI branding (Pro plan required)
- Add Message Suggestions: e.g., 'Pricing Plans', 'How to create a website?'
- Select Brand Color
- Add Social Links: Twitter, Instagram, TikTok, YouTube, GitHub, Website
Preview & Publish
Use the live preview panel to test your chat bubble before publishing.
Copy your bot URL (for example, https://app.chatbix.ai/@my_bot_test) and open it in a new tab to access your bot directly
Telegram Integration
Deploy Chatbix AI as a Telegram bot to handle user conversations automatically.
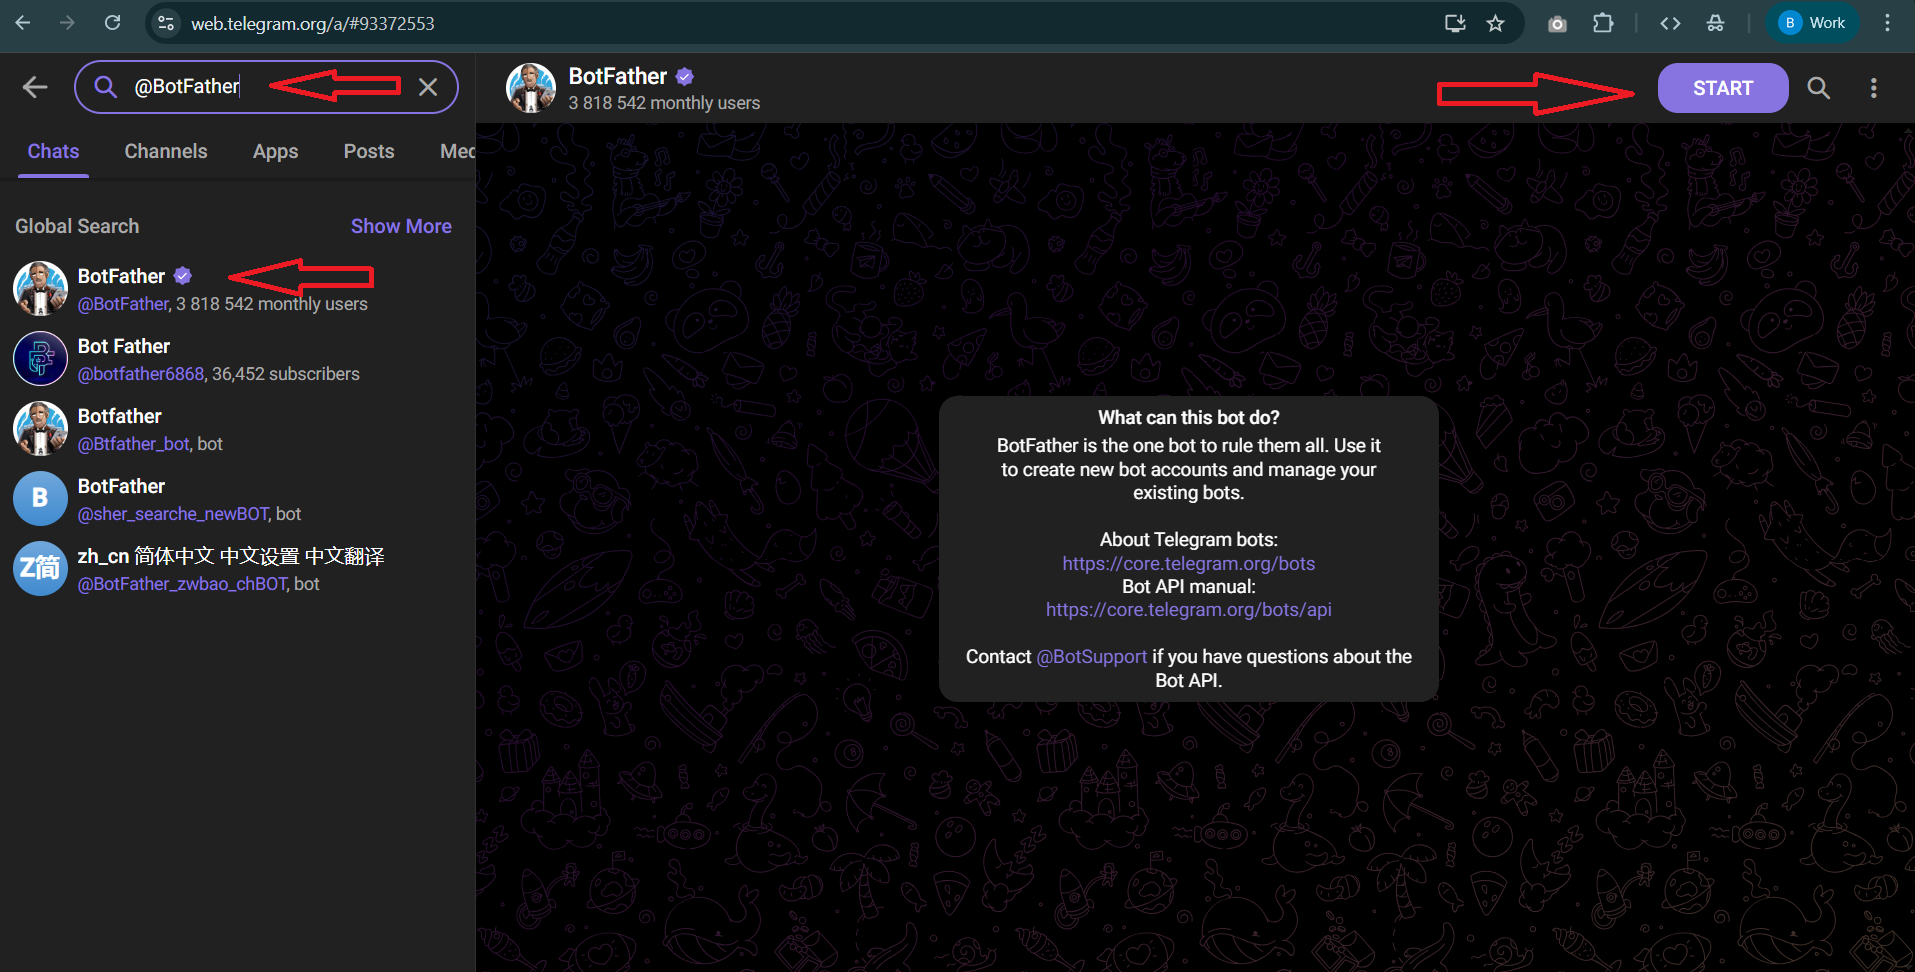
Create a Telegram Bot
Go to Telegram and search for @BotFather.
Generate a Telegram Bot Token
Type /newbot in the chat with @BotFather.
Enter your bot name.
Enter your bot username. It must end with bot.
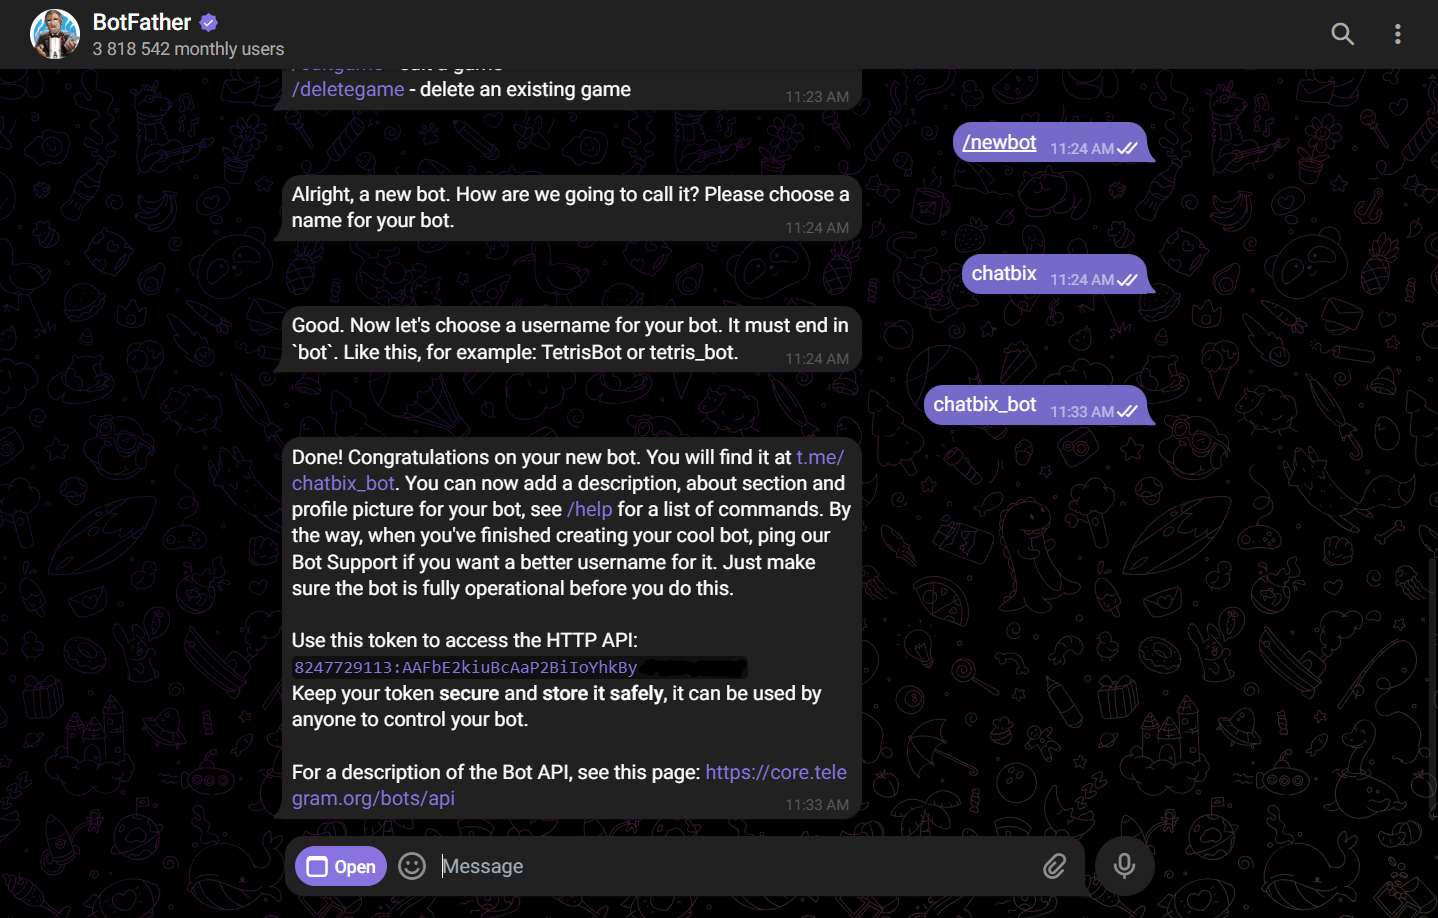
Copy the generated bot token.
Integrate the Bot Token in Chatbix AI
Go to Chatbix Agents → Account Settings → Deploy → Telegram.
Open Telegram settings and click Add a Telegram Bot.
Paste the bot token copied from @BotFather.
Click Create.
Activate the Integration
Go to Telegram and search for your bot to start using it.
How to Create a Telegram Bot and Connect It to Chatbix AI
Learn how to generate a Telegram bot token and integrate it with Chatbix AI to activate automated Telegram conversations.
Video: Step-by-Step Video Guide
Slack Integration
Integrate Chatbix AI with Slack to assist teams, answer internal questions, and automate workflows.
Open Slack Integration
Go to Chatbix Agents.
Select your agent, then navigate to Settings → Deploy.
Click on Slack to start the integration.
Connect a Slack Workspace
Click Connect Slack.
You will be redirected to Slack to authorize Chatbix AI.
Choose an existing Slack workspace or create a new one if you don’t have any.
Authorize Slack Access
After clicking Connect, you will be redirected to Slack’s authorization page.
Select the Slack workspace you want to connect.
Sign in to your Slack account if required and approve the requested permissions.
Complete Integration in Chatbix AI
Once authorization is complete, you will be redirected back to Chatbix AI.
Go to Agents → Settings → Deploy → Slack.
Select the connected Slack workspace from the list and save your changes.
Start Chatting on Slack
Open your Slack workspace, type /ask in the chat, press Space, and then enter your question.